
Google Adwords Remarketing 2017
What is it?
In a Nutshell - Google Adwords Re-marketing will Generate More Sales through Higher Conversions from your existing web site visitors.
Because "95% of first-time website visitors are only there to research on your website and not purchase." (marketo)
It makes sense to re-engage a user who has shown some level of interest in you, rather than trying to acquire more of those first-time clicks.
That’s why remarketing works. Repeated exposures to your brand or products and at least 3-4 visits to your website from a new prospect increase the chances substantially thet they will contact or buy from you.
Ever been browsing a site and clicked into a few products maybe putting some products in your cart, but exit the site before going to the checkout? From then on you start to see that product on other sites as a constant reminder.- That is google Adwords Remarketing.
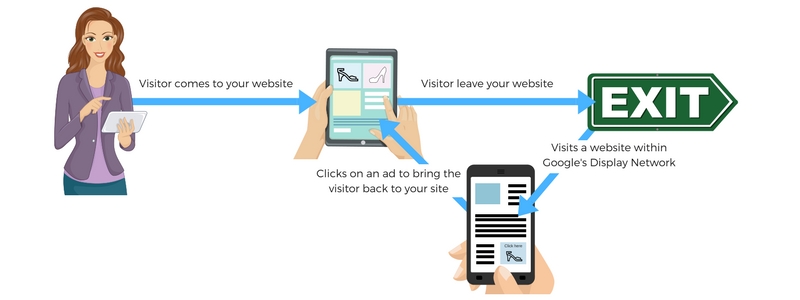
How does it work?
When visitors come to your site they are tagged with a cookie, this cookie is activated when the visitors visit a certain page on your site. This activated cookie will follow them onto sites that are within the Display Network (the newtork of sites that collaborate with Google Adwords). It is a great way to increase conversions and brand awareness.
Why use remarketing?
Getting activity on your site but no one committing?
This is where remarketing is suited for you as you need a minimum of 100 visitors in the last month for you to qualify for a campaign. Remarketing is considered cost effective as you only pay for the clicks on your ads. Google has a large scale reach with over 2 million sites within the Display Network. If you want to learn more about the Display Network and where your ads might show on these sites visit google remarketing info here.
Ways to remarket with google adwords
Google offers several remarketing strategies to you when you are setting up your campaign
Standard remarketing - Show ads to your past visitors as they browse Display Networks websites.
Dynamic remarketing - Ideal for e-commerce sites. This takes your campaign that step further by showing the products that were in in visitors basket or cart before they left the site.
Remarketing for mobile apps - Same as standard but more focused on mobile websites and apps.
Remarketing lists for search ads - Show ads as past visitors do follow up searches on google.
Email-list remarketing - When a customer with an existing google account visits your site and then logs into thier own account ads will show in their Google searches, Youtube, and Gmail.
How to set up Google Adwords remarketing
Step 1. To start the set up process you will need an Adwords account if you want GTP to set this up for you click here.
If you are setting up a remarketing campaign for the first time there are some important steps you'll need to follow. You will need to add code into your website so that the cookies know when to be activated.
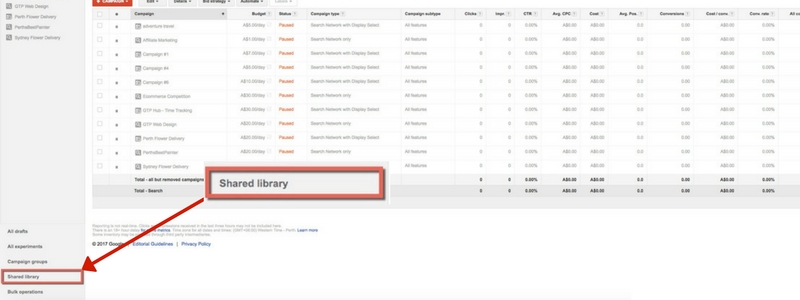
Once you have logged in go into your campaigns and select Shared Library in the bottom left menu shown in the image below.
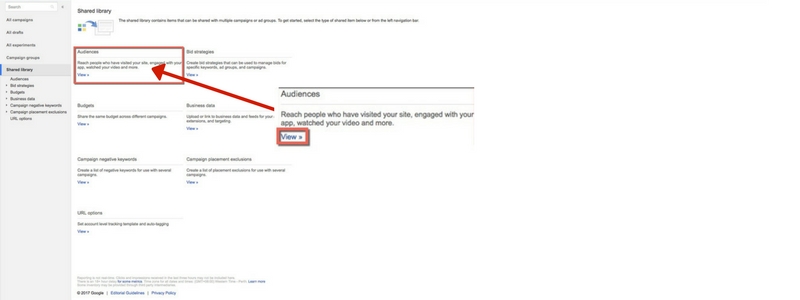
Once in this window select Audiences then view.
Step 2. This will take you to a page that will ask you to set up the remarketing tag code. There will be an option to email more detailed instructions to an email address, place your email or the email of whoever will be setting this code up. They will be sent detailed instructions and the Code that is personailsed to your site.
Please Note: For GTP sites you will be unable to edit the code so this part will have to be set up by us.
Helpful Plug in: To help with testing and ensuring the tag is on all pages of your site Tag assistant plugin on Chrome is recommended. This will let you know if the tag Code is active and working on your site.
Step 3. Once this is set up when you click on audiences you will get taken to this page (shown above). Google will automatically pool all Visitors into a list but you do have options to upload and customise your lists.
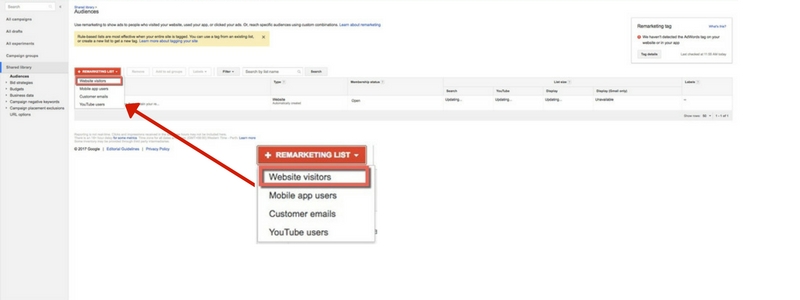
Selecting Website vistors will allow you to edit your visitors lists. You will need to choose what page you want site vistiors to have to be onto for the cookie to be activated. This will go in the URL section on the form shown below.
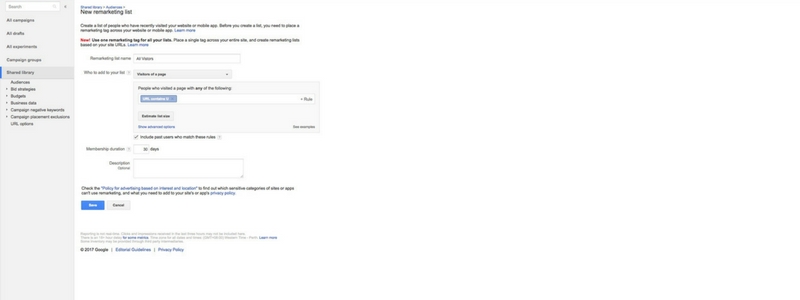
Helpful information: Membership duration is the length of time that a visitors will see advertisements for your company, the default is 30 days and the maximum days is 540 after this time the user is removed from the list.
High value goods or services: recommended that you set a higher number of days as they have a higher conversion funnel rate if your ads follow for a longer period of time..
Low value goods and Clothing: The recomendation is that you set it for around 7 days as the choice to purchase items such as these is much shorter.
Step 4. Go into your campaigns tab at the top of the page, then you will be able to select campaign and the Display Network only.

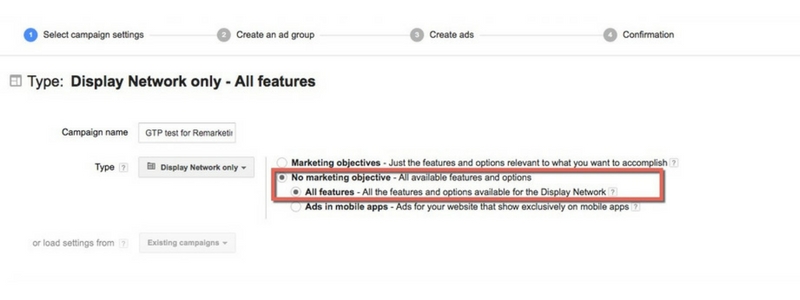
Step 5. Once in Display Network you will be able to name your campaign. Select no marketing objective and All features
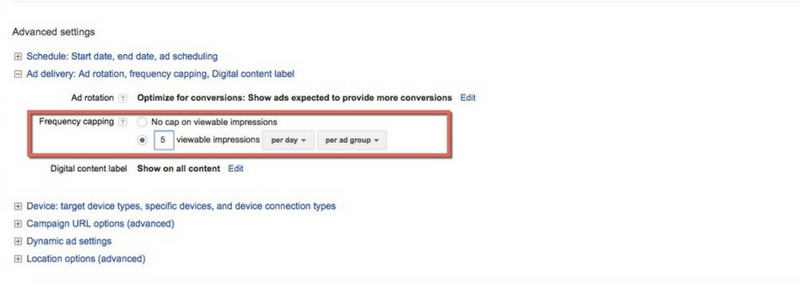
You will then need to set up your locations setting, ad schedules, and your daily budget from this page. It is important to set up Ad deliver: Ad rotation, frequency capping (this is located at the bottom of the screen under Advanced settings). This will help you to control the number of times the ad is shown the ideal frame is between 5 and 8.
E-commerce sites can take it a step further with dynamic remarketing this will allow you to generate display ads that pull though products that visitors have shown interest in.
Now you have done all the basic set up its time to create your ads Graphics.
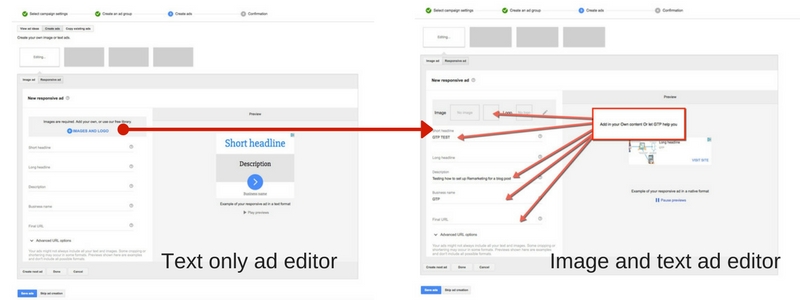
Step 6. This section allows you to add different styles and media ad types. You can create your own ads and upload them or use Googles layouts. GTP can design an ad and handle uploading these graphics.
If your stuck for ideas you can upload your Website URL and the Adbuilder will generate some ideas for Ads for you to use as a starting point.
Helpful resources on Image size restrictions and policies: Advertising Policies Help and Create an Image Ad
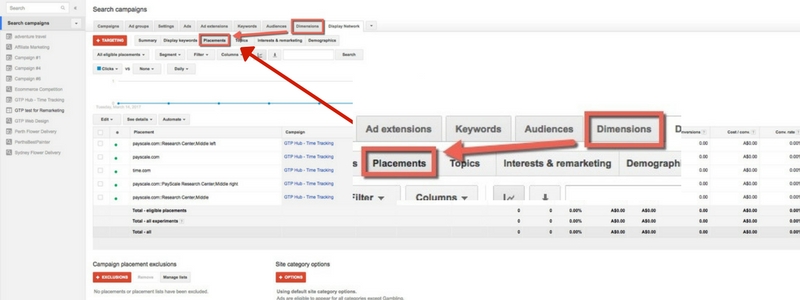
Step 7. Select Dimensions and then Placements. Placement has to do with what sites your campaign will show selecting related sites is a good place to start. However you are able to edit and update the site list as over your campaign sites may be no longer appropriate for your demographic.
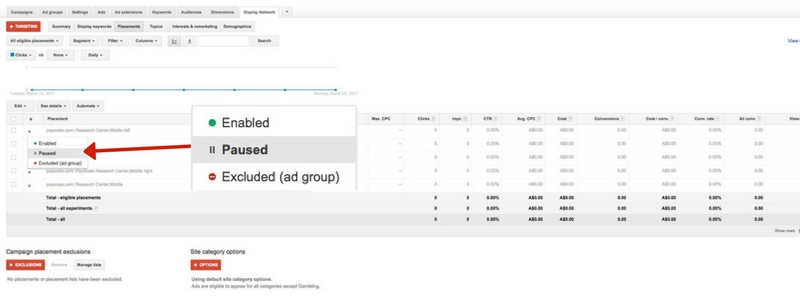
Here you can see how many clicks each site has had so you can pause or remove sites that are not generating you much traffic.
Now the basic set up for your campaign is all set up and your Ads will show across your selected sites to prospects who have visited your web site.
If you want to edit graphics please note that you will have to retart the campaign to do so. For explanations on how to update campaign ad graphics and text go to the Google Adwords Remarketing - image update blog post.
Resources
- Google Resource - Create Your First Display Remarketing Campaign
- Niel Patel - Guide to Generating Sales From Remarketing