

Google Adwords Remarketing - Updating graphics
It is important to note that in Display Network Campaigns if you wish replace images ads in a campaign Adwords will automatically create a new ad as and you will loose your stats for those ads.
Step 1 - Getting to your ad group
Go into the Campaign and ad group that you wish to edit your images. 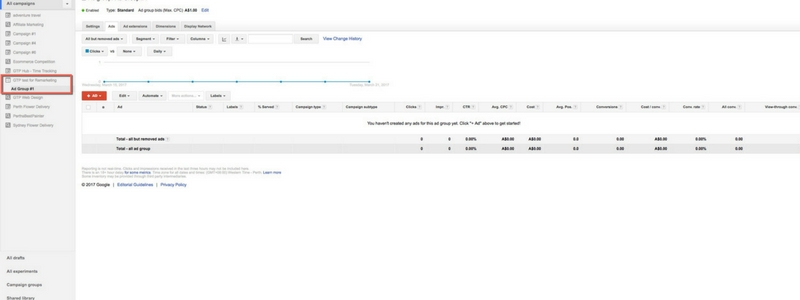
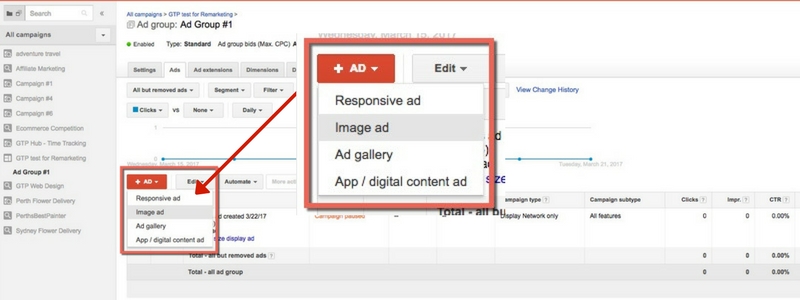
once in the ad group you will be able to select + AD and then Image Ad.
Step 2. Uploading Your own images
At this point you can either create your Ad completely from scratch and upload. Or you can create an Ad with Google Ad builder. We will start with what to do if you choose to upload your own images.
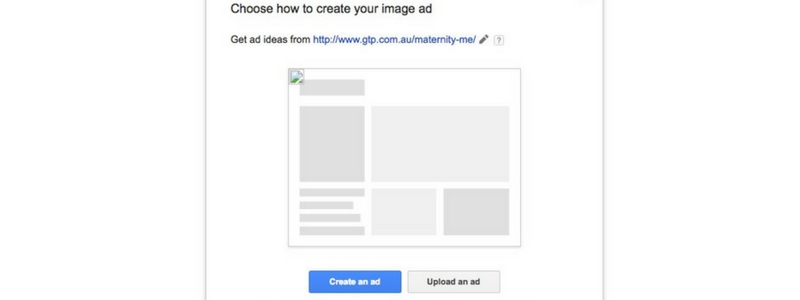
This will take you to to the page shown below
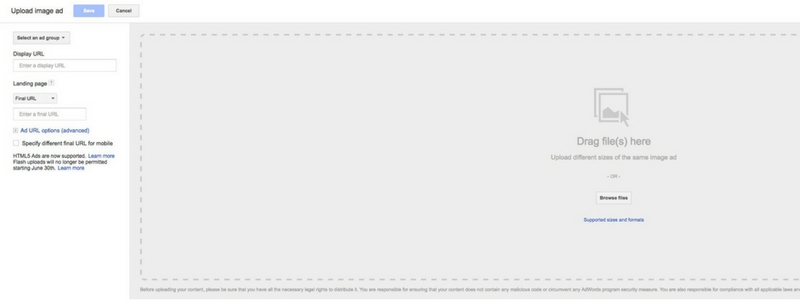
From here all you will need to do is drag in your image in but make sure it is within one of the many size options below.
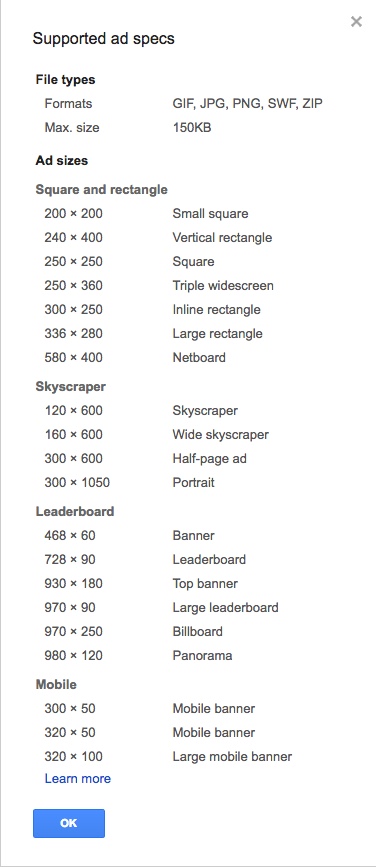
The sizes above are all the accepted sizes. While you may not need all these sizes it is a very good idea to have a large range of sizes.
How many graphics should you create? (these are suggestions from Google you are free to choose whatever size you want)
- Between 8 - 10
- 2 mobile
- 1 banner
- 3 vertical rectangles
- 1 small square
- 1 large square
Please note: Ads you create will need to be approved by Google before the campaign can run with them. This will take around 1-2 business days.
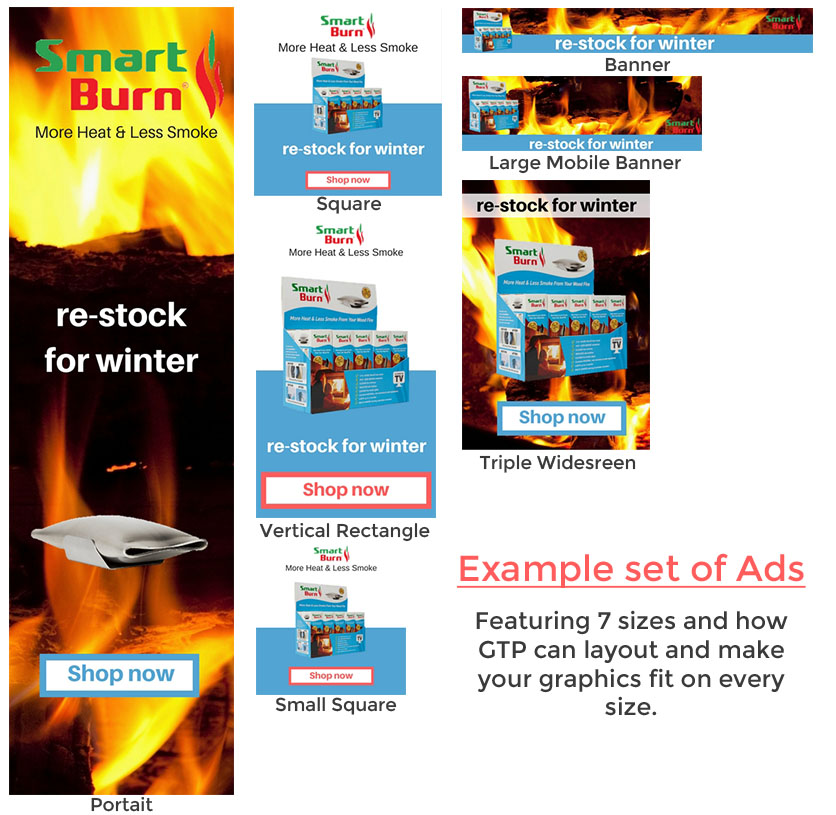
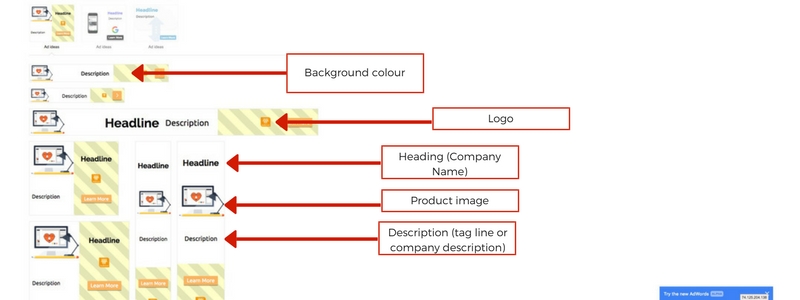
If your after some Ideas below are some size examples and some layout examples that GTP have designed.
Step 2. Using Google Adbuilder to create your ads
As explained earlier to update and image select the ad group you wish to edit and go into image Ad. However this time you will select Create an Ad. This will bring up a selection of basic layouts for you and will allow you go through each layout and see all the options and sizes that will show. Once you pick a layout you like select edit to open the Ad editor window.
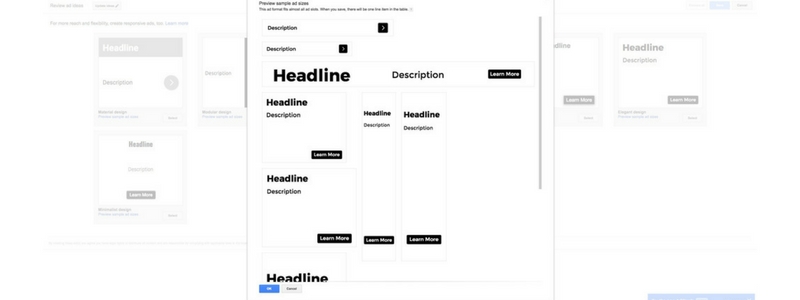
Below is the editor Window and some insights into basic setup.
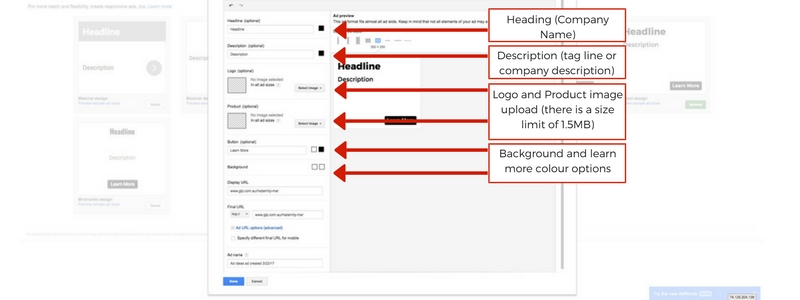
If you want to make sure your image will suit all sizes this section shown below allows you to test out the sizes. The image below is also a lot larger to help you see all the editable content with ease.
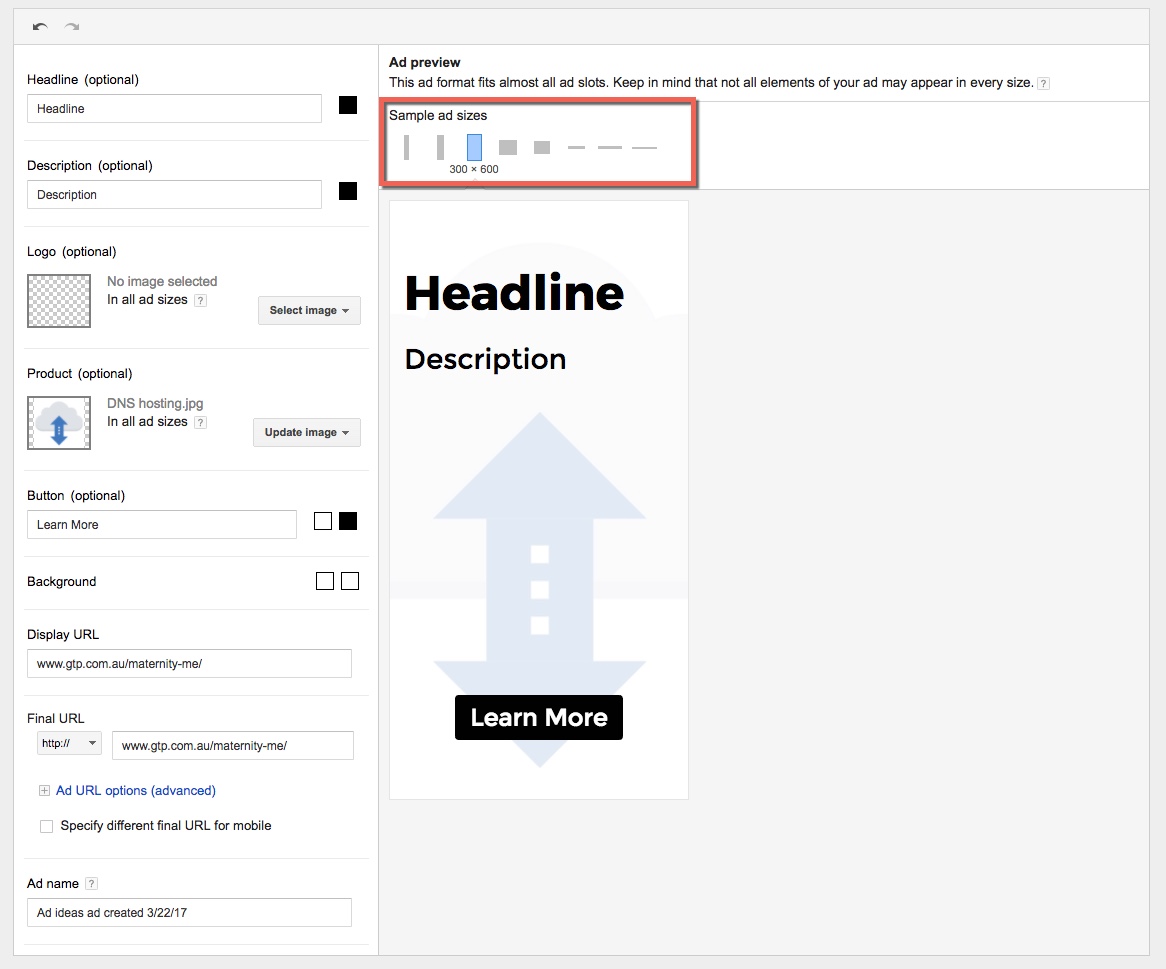
Below is another way to test your ad size. It is important to test in all these places because once your ad is saved to an active campaign to edit it you will need to restart with your stats for that campaign.
Step 3. Saving and adding to your campaign
Save your ad and make sure your Campaign setting are all good to go and that of course your campaign is active. If you are unsure you can create drafts and experiment campaigns until you get the hang of setting up campaigns.