
Business Facebook
Step 1: Sign up
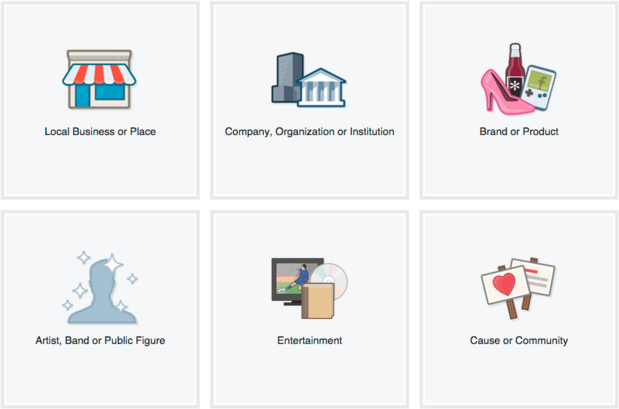
Go to facebook.com/business and click Create a Page in the top right hand corner. You’ll be greeted with several business type options including local business or place, brand or product, and cause or community. Select the type of business you’re creating the Facebook Page for. If your business type falls into more than one of the category options, choose the one your customers are most likely to think of when they think about your business.
When you click on a business type, a box will open asking for a few further details, like the name of your business, your address, and your Page category. Categories are basically sub-types within the larger business category you’ve already chosen. When you start typing in the category field, you’ll see a list of potential category options to choose from.
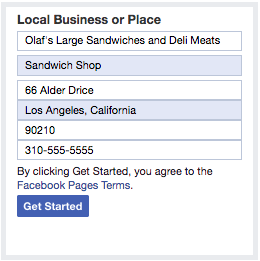
When you’re ready, click Get Started. Note that doing so indicates your acceptance of Facebook’s terms and conditions for Business Pages, so you might want to check those out before you proceed.
Step 2. Add Pictures
Next, you’ll upload profile and cover images for your Facebook Page. It’s important to create a good visual first impression, so choose wisely here. Make sure the photos you choose align with your brand and are easily identifiable with your business.
You’ll upload your profile image first. This image accompanies your business name in search results and when you interact with users, and also appears on the top left of your Facebook Page.
If you’re a big brand, using your logo is probably a safe way to go. If you’re a celebrity or public figure, a picture of your face will work like a charm. And if you’re a local business, maybe a well-shot image of your signature offering is what will allow a potential follower or customer to make the connection immediately.
Your profile picture will appear as a square on your Facebook Page, but will be cropped to a circle in ads and posts, so don’t put any critical details in the corners. Once you’ve chosen a great one, click Upload Profile Picture.
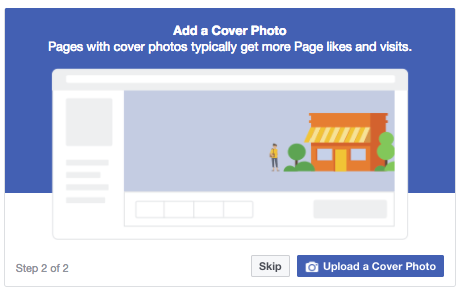
Now it’s time to choose your cover image, the most prominent image on your Facebook Business Page. This image should capture the essence of your brand and convey your brand personality. It will display at 820 x 312 pixels on desktop or 640 x 360 pixels on mobile. The image must be at least 400 pixels wide and 150 tall.
Once you’ve selected an appropriate image, click Upload a Cover Photo.
Step 3: Explore your new Page
Ta-da! Your page is alive, albeit it extremely sparse. At this point, you’ll be prompted to take a quick walk-through of a few features. Unless you’re already well aware of how Facebook Business Pages operate, we recommend clicking through the prompts, just so you know where everything is. It only takes a few seconds.
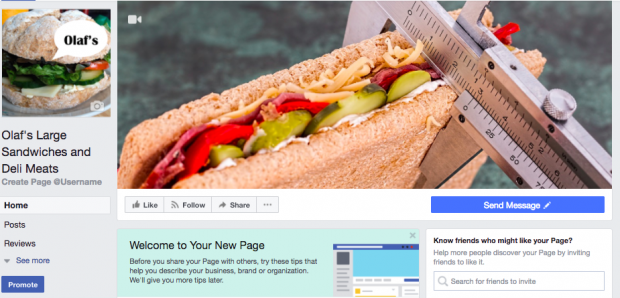
Of course, while the skeleton of the Facebook Page for your business is now in place, you’ve still got some work to do before you share it with your audience.
Step 4: Add a short description
This is your opportunity to tell people about your business. It should be just a couple of sentences (maximum 155 characters), so there’s no need to get too elaborate here. Click Add a Short Description, then just share what your customers need to know as clearly and concisely as possible. You can add a longer description later on.
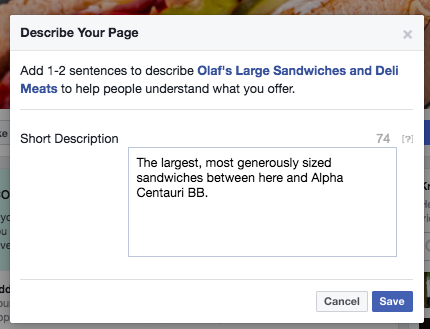
Click Save when you’re done.
Step 5: Create your username
Your username, also called your vanity URL, is how you’ll tell people where to find you on Facebook. Your username can be up to 50 characters long, but don’t use extra characters just because you can. You want it to be easy to type and easy to remember. Your business name or some obvious variation of it is a safe bet.
Click Create a Username for Your Page to set up your vanity URL.
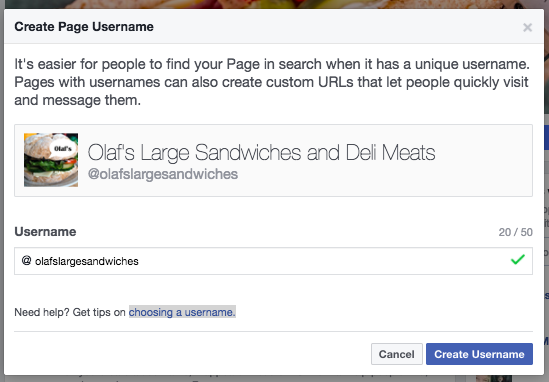
Click Create Username when you’re done. A box will pop up showing you the links people can use to connect with your business on Facebook and Facebook Messenger.
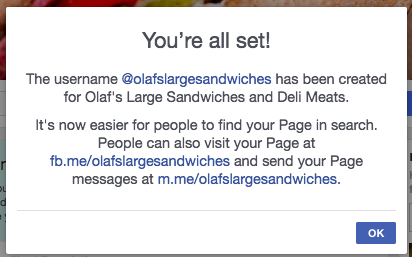
Click OK to continue filling in your Facebook for business Page details.
Step 6: Complete your about section
While you might be tempted to leave the details for later, it’s important to fill out all of the fields in your Facebook Page’s About section right from the start. As Facebook is often the very first place a customer goes to get information about you, having it all there is extremely important. If someone is looking for a business that’s open till 9 and can’t find this information on your Page, they’ll surely keep looking until they find another place that’s more forthcoming.
It’s also a good idea to list information about your Facebook Messenger protocol, such as your customer service reps’ online hours and estimated response time.
To get started, click About in the left-hand menu of your Facebook Page.
From this screen, you can add or edit your specific business details, like your start date, contact information, and other social accounts. Depending on your type of business, you may be able to add specific details like a menu or information about your price range and whether you offer valet parking.
This is also the screen where you can add a longer description of your business. Click Edit Story on the right side of the Page to provide a detailed description of what your business offers customers and why they should Like or Follow your Page. This is a great place to set expectations about how you’ll interact with fans through your Facebook Page for business purposes and to offer a compelling reason for them to engage with you online.
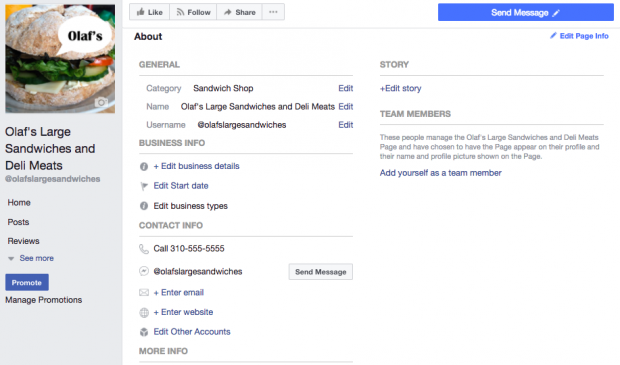
To specify your business location and hours, click Edit Page Info on the top right of the screen.
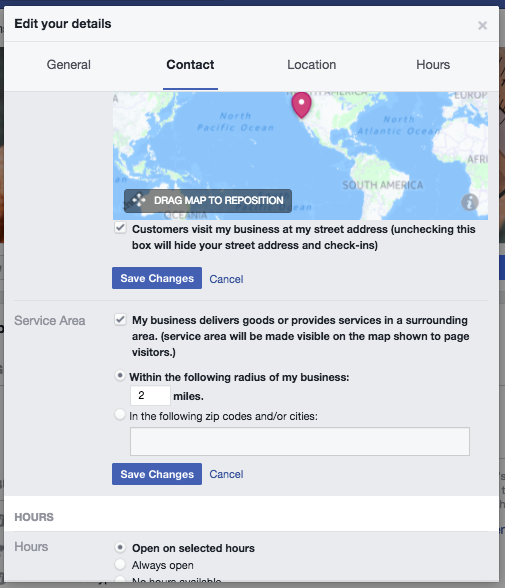
When you’re finished, click Save Changes.
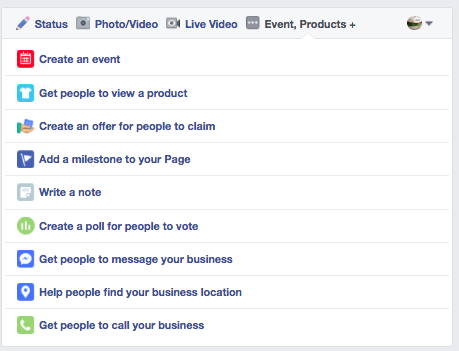
Step 7. Create your first post
Before you start inviting people to like the Facebook Page for your business, you’ll want to make sure you share some valuable content. You can create some of your own posts, or share relevant content from thought leaders in your industry.
You could also create a more specific type of post, like an event or product offer—just click through the tabs at the top of the status box to bring up all the options.
Make sure that whatever you post offers value for your visitors when they arrive at your Facebook Page, so they’ll be inclined to stick around.
Your Facebook Business Page now represents a robust online presence that will make potential customers and fans feel comfortable interacting with you.